

Passing a CDL Hazmat endorsement practice test is your first real step toward a more secure, better-paying career in trucking. This isn't just about adding another letter to your license; it’s a direct investment in your future, opening up specialized, high-demand jobs that companies are always desperate to fill.
Why a Hazmat Endorsement Puts Your Trucking Career in the Fast Lane
Getting your Hazmat endorsement is one of the smartest things a commercial driver can do. Yes, it takes some real study time to pass the test, but the payoff is huge and almost immediate. It completely changes your value in the eyes of any logistics company.
Companies don't just prefer drivers with a Hazmat endorsement—they actively hunt for them and are ready to pay a premium. Why? Because you become certified to handle the sensitive, regulated materials that keep our country’s most critical industries running.
-
Serious Job Security: Drivers who can legally haul hazardous materials are always in demand. Think about it: fuel, chemicals, medical supplies—this stuff has to move, no matter what the economy is doing. That makes you a far more recession-proof driver.
-
Access to Better Gigs: The endorsement unlocks jobs in specific fields like hauling petroleum, chemicals, or even environmental waste. These niches usually mean better routes, more consistent work, and, most importantly, higher paychecks.
-
It Shows You’re a Pro: Earning your Hazmat endorsement tells employers you’re serious about safety and professional responsibility. It’s a clear signal that you’re a skilled driver who can be trusted with complex rules and high-stakes cargo.
Let’s Talk About the Money: The Real Financial Upside
The most convincing reason to get your Hazmat endorsement? The significant pay bump. The numbers don't lie—there's a major gap between what a standard CDL holder makes and what a Hazmat-certified driver brings home.
The Hazmat endorsement isn’t just about what you can haul; it’s about what you can earn. It elevates you from a general driver to a specialized professional, and your income will reflect that.
And this isn't just a small bonus. We're talking about a life-changing increase in your annual salary. For example, the average truck driver earns around $46,673 a year. But once you add a Hazmat endorsement and start pulling tankers, that average shoots up to $66,555.
That’s a massive 42% jump—thousands of extra dollars for you and your family each year.
Big carriers are putting real money on the table for these skills. At a company like Covenant, an experienced Hazmat driver with just one year on the road is guaranteed at least $1,000 a week. If you have 5+ years of experience, you could be earning up to 56 cents per mile. Do the math: run 2,500 miles in a week, and you’re banking over $1,400 from mileage alone.
Building a Foundation for the Long Haul
At the end of the day, the time you spend studying for the Hazmat test pays you back for years. It’s a qualification that sticks with you, constantly opening doors to better opportunities.
If you’re ready to take this step, looking into a structured CDL training program can give you the expert guidance you need to ace the test. This endorsement isn't just for your next job; it’s for a more stable and prosperous career on the open road.
Your Checklist For The Hazmat Application And TSA Check
Before you can even think about acing the exam, you've got to get through the paperwork. I've seen plenty of drivers get tripped up by this part. Navigating the Hazmat application and the mandatory Transportation Security Administration (TSA) background check can feel like a maze, but it’s a non-negotiable first step.
Think of this checklist as your roadmap—it'll help you get everything in order without the usual headaches, so you can focus your energy where it matters most: studying and passing the test with confidence.
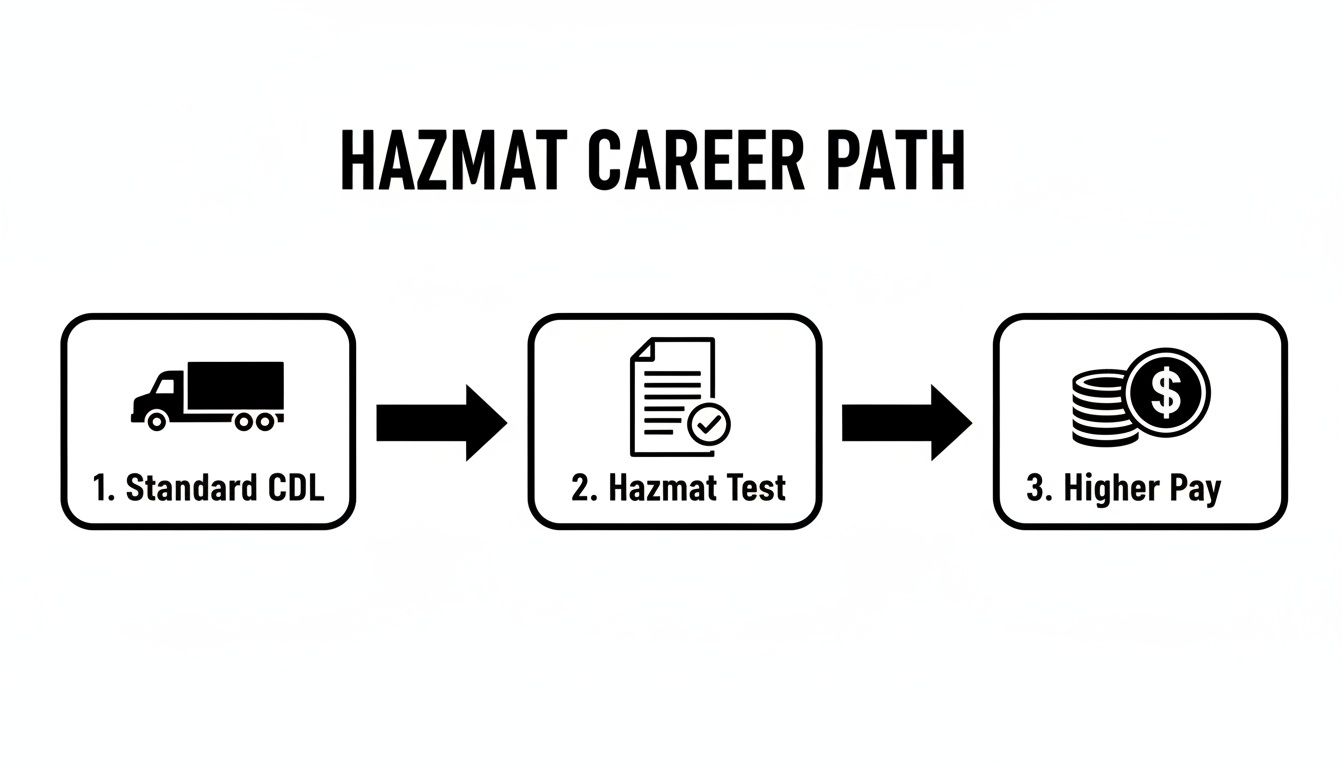
The path is pretty clear. Putting in the work to get your HME is a strategic move that opens doors to better-paying freight.
Starting Your Hazmat Application
The journey to getting your Hazmat endorsement (HME) kicks off with a few key requirements. First and foremost, you need a valid Commercial Driver’s License (CDL) from your home state. This isn’t an entry-level permit; it's an advanced certification for drivers who already have their CDL.
You’ll also need to prove your legal status. This means having original or certified copies of documents like a U.S. birth certificate, a valid U.S. passport, or proof of lawful permanent residency. They won't accept photocopies, so make sure you have the real deal ready to go.
Finally, a valid DOT medical certificate is absolutely required. It’s a standard part of keeping your CDL, but double-check that it’s current when you apply for your Hazmat endorsement.
The Mandatory TSA Security Threat Assessment
Every single person applying for a Hazmat endorsement has to go through a TSA Security Threat Assessment. There are no exceptions. It’s a federal requirement designed to ensure that anyone transporting hazardous materials doesn't pose a security risk.
Here’s what that process looks like:
- Online Application: You'll start by filling out an online form. This is where you provide all the personal information for the background check.
- Fingerprinting: After submitting the application, you have to schedule an appointment to get your fingerprints taken at an approved enrollment center.
- The Waiting Game: The TSA then does a deep dive into your background. This can take anywhere from 30 to 60 days, so it’s critical to get the ball rolling on this as soon as possible.
Pro Tip: Do not wait until you pass the written test to start the TSA background check. Kick off the application and get your fingerprints done right away. This way, your approval is ready and waiting when you pass, and you won’t have any delays getting the endorsement added to your license.
Entry-Level Driver Training And State Requirements
As of February 7, 2022, all drivers seeking a Hazmat endorsement for the first time must complete mandatory Entry-Level Driver Training (ELDT). This isn't just a formality—the training has to be done by a school listed on the FMCSA's Training Provider Registry. It covers a specific curriculum designed to get you ready for the real-world situations you’ll face on the road.
Once your ELDT is done and your TSA background check is approved, you’re ready for the knowledge test at your state's DMV. The test itself is a 30-question exam, and you’ll need to score an 80% or higher to pass.
The fees for the test can vary quite a bit depending on where you live, from as low as $10 in Iowa to nearly $50 in places like California. A full breakdown of state-specific CDL requirements can give you a better idea of what to expect locally.
Hazmat Endorsement Application Checklist
To keep things simple, here’s a step-by-step checklist to guide you through the entire application and TSA background check process. Follow this, and you won't miss a beat.
| Step | Action Required | Key Details & Tips |
|---|---|---|
| 1 | Gather Your Documents | You'll need your valid CDL, proof of U.S. citizenship or lawful residency (original/certified copies only), and a current DOT medical card. Don't use photocopies. |
| 2 | Start the TSA Security Threat Assessment | Go to the TSA Universal Enrollment Services website to begin the online application. Do this before you even start studying for the written test. |
| 3 | Schedule Your Fingerprinting Appointment | Once the online application is submitted, schedule an appointment at a local enrollment center to provide your fingerprints. |
| 4 | Complete ELDT Hazmat Training | Find a provider on the FMCSA's Training Provider Registry and complete the required Hazmat theory instruction. Your provider will submit your completion record electronically. |
| 5 | Wait for TSA Approval | The background check can take 30-60 days. You can check your status online, but be patient. This is the longest part of the process. |
| 6 | Study for the State Knowledge Test | While waiting for TSA approval, focus on studying the hazmat regulations. Use your state’s CDL manual and take multiple practice tests. |
| 7 | Take and Pass the Hazmat Test | Once your TSA approval comes through and your ELDT is on record, head to the DMV to take the 30-question written exam. You need at least 80% to pass. |
By working through this checklist methodically—from getting your documents in line to clearing the TSA check and completing your training—you’re setting yourself up for a smooth process. Clearing these administrative hurdles first lets you put your full attention where it belongs: on the study material.
Feeling like you're trying to drink from a firehose when you open the CDL manual? You're not alone. The secret to passing the hazmat test isn't about memorizing the book cover-to-cover, but about understanding the core ideas and how they play out on the road. A solid study plan is what turns that mountain of regulations into manageable chunks.
Instead of just flipping through chapters, let's carve up the essentials into a practical, week-by-week schedule. This way, you're not just reading rules; you're connecting them to the real world and building skills you'll actually use behind the wheel.

Week 1: The Visual Language of Hazmat
Your first week is all about mastering the visual side of things: classes and placards. These aren't just colorful diamonds slapped on a trailer; they're a universal language. They instantly communicate danger to you, other drivers, and first responders who might be rolling up to a bad scene.
Think of each placard as a critical warning sign. A Class 3 placard screams flammable liquids, while a Class 8 warns of corrosives. The goal this week is to get to the point of instant recognition, not just rote memorization.
- Your Focus for Week 1:
- The Nine Classes: Get a firm handle on what each class represents, from Class 1 (Explosives) all the way to Class 9 (Miscellaneous).
- Placard ID: Drill the colors, symbols, and numbers for each class. You need to know without a doubt that a red diamond means flammable and an orange one means explosive.
- Placarding Rules: This is huge. You have to know when a placard is required. This includes the famous 1,001-pound rule and, just as importantly, which materials (like certain explosives or poison gases) need a placard no matter how little you're hauling.
Getting a deep understanding of these classifications is non-negotiable. For a great breakdown, you can find a complete guide to the nine classes of dangerous goods online. Remember, this knowledge is foundational and ties directly into a lot of questions you'll see on the broader CDL general knowledge test too.
Week 2: Paperwork and Proper Loading
Once you can identify hazmat on sight, it’s time to tackle the paperwork and the physical handling. This is where precision is everything. A tiny mistake on your shipping papers or a poorly secured load can have catastrophic consequences.
Shipping papers are the legal and safety blueprint for your load. They have to be perfect, easy to grab in a hurry, and describe the materials in a very specific order. Likewise, loading hazmat isn't just about tying stuff down so it doesn't shift—it's about preventing dangerous chemical reactions.
Real-World Gut Check: Picture this: You're hauling a mixed load with Class 8 (Corrosive) and Class 4.3 (Dangerous When Wet) materials. The segregation rules are crystal clear—they cannot be loaded next to each other. Why? If that corrosive liquid leaks and touches the "dangerous when wet" stuff, you could create a deadly toxic gas right there in your trailer.
Here's your focus for the second week:
- Shipping Papers: Know exactly what info is required—proper shipping name, hazard class, ID number (UN/NA), and packing group. Crucially, you also need to know exactly where those papers must be kept in the cab for immediate access.
- Loading & Segregation: Get intimate with the Segregation Table for Hazardous Materials. This isn't optional; it's a guaranteed part of the test. You must know which classes of materials can never be on the same truck together.
- Blocking & Bracing: Learn the specific techniques for securing hazmat cargo. This is about more than just keeping the freight from falling over; it's about making sure it doesn't move an inch.
Week 3: Emergency Response and Security
Your final week of intense prep is all about the "what ifs." You hope you never have an emergency or face a security threat, but being prepared for one is a core part of the job. This knowledge doesn't just get you a passing grade; it can save lives.
Emergency response isn't about playing the hero. It's about taking the correct, methodical steps to keep a bad situation from getting worse. That means knowing who to call, what to tell them, and how to protect yourself and the public.
Security has become just as critical. Since 9/11, truck drivers are the front line of defense in making sure hazardous materials don't end up in the wrong hands.
- Key Topics for Week 3:
- Emergency Drills: Know the immediate steps for a leak or a crash. This includes getting to a safe spot, keeping people away, and making the right phone calls to the right authorities.
- Using the ERG: The Emergency Response Guidebook (ERG) is your bible in a crisis. Learn how to use it to look up a material and understand its specific fire, explosion, and health hazards.
- Security Plan: Get familiar with the requirements for a written security plan, what you need to do to stay secure on the road, and how to spot and report a potential threat.
By breaking your study plan into these three focused weeks, you build your knowledge layer by layer. You start with identification (placards), move to handling (papers and loading), and finish with crisis management (emergencies and security). This approach ensures you’re ready for whatever the cdl hazmat endorsement practice test can throw at you.
Full-Length Hazmat Endorsement Practice Test
Alright, you've put in the study time. Now it's time to see how that knowledge holds up under pressure. Reading the material is one thing, but actually applying it when the clock is ticking is a whole different ball game.
This is a complete, 30-question cdl hazmat endorsement practice test built to feel just like the real deal you'll be taking down at the DMV. The questions cover the entire spectrum of what you need to know—placarding, shipping papers, loading rules, what to do in an emergency, and security protocols.
I recommend you treat this seriously. Find a quiet place where you won't be interrupted, maybe even set a timer, and tackle these questions one by one.
Once you’re finished, don't just glance at your score. The real learning happens in the answer explanations. We've laid out not just what the right answer is, but why it's correct. Digging into those details is how you cement the information in your head.
This process will show you exactly what you've mastered and, more importantly, what topics might need another look before the official test. You're aiming for at least 80%, which means getting 24 out of 30 questions right. Let's get started.
The Practice Exam Questions
-
A placarded vehicle must carry a fire extinguisher with a minimum UL rating of:
- A) 5 B:C
- B) 10 B:C
- C) 20 B:C
- D) A rating is not required.
-
When are you required to stop before crossing a railroad grade crossing?
- A) Only when hauling explosives.
- B) When your vehicle is placarded.
- C) Only when hauling flammable liquids.
- D) Only if a train is visibly approaching.
-
Shipping papers for hazardous materials must be kept:
- A) In a locked glove compartment.
- B) On the driver's seat when out of the vehicle.
- C) In the sleeper berth.
- D) In a binder in the passenger side door pocket.
-
The hazard class of a material is found where on the shipping papers?
- A) Listed only by its UN/NA ID number.
- B) In the column titled "Hazard Class."
- C) It is not required on shipping papers.
- D) In the emergency contact information section.
-
Which of the following materials would be unacceptable to transport in a trailer with a heater/cooler unit?
- A) Class 5.1 (Oxidizers)
- B) Class 8 (Corrosives)
- C) Class 1 (Explosives)
- D) Class 9 (Miscellaneous)
-
"Reportable Quantity" or "RQ" on shipping papers indicates:
- A) The material requires a special permit.
- B) The carrier must report any spill of that quantity or more.
- C) The material is being shipped for research only.
- D) The quantity of the material is an estimate.
-
If you are hauling Division 1.1, 1.2, or 1.3 explosives, you must not:
- A) Drive through a tunnel.
- B) Park within 5 feet of the traveled portion of the road.
- C) Both A and B.
- D) Neither A nor B.
-
The Segregation Table for Hazardous Materials is designed to prevent:
- A) Theft of valuable materials.
- B) Overloading the vehicle's axles.
- C) Mixing of materials that could cause a dangerous chemical reaction.
- D) Damage to the shipping containers.
-
What does a placard with the number "4" in its lower corner represent?
- A) A flammable solid.
- B) An oxidizer.
- C) A corrosive material.
- D) A radioactive material.
-
Who is responsible for providing the placards for a hazardous materials shipment?
- A) The driver.
- B) The carrier.
- C) The shipper.
- D) The receiver of the freight.
-
On a shipping paper, the proper shipping name, hazard class, and ID number must be listed in what order?
- A) Any order is acceptable as long as the information is present.
- B) ID number, proper shipping name, hazard class.
- C) Proper shipping name, hazard class, ID number.
- D) Hazard class, proper shipping name, ID number.
-
A container of hazardous material has a secondary hazard. Where is this information found?
- A) It must be listed in parentheses after the primary hazard class on shipping papers.
- B) It is only indicated by a second placard.
- C) It is not required to be listed.
- D) The driver must look it up in the ERG.
-
Which document is the driver's primary guide during a hazardous materials emergency?
- A) The bill of lading.
- B) The vehicle's owner manual.
- C) The Emergency Response Guidebook (ERG).
- D) The company's safety policy.
-
If you discover a leak in your hazardous materials load while driving, you should:
- A) Continue driving to the nearest company terminal.
- B) Pull over in a safe, open area away from people and buildings.
- C) Immediately call your dispatcher and wait for instructions.
- D) Try to patch the leak yourself.
-
A "residue" placard is required when:
- A) A tank is completely empty and clean.
- B) A placarded tank has been emptied but not cleaned.
- C) A shipment contains less than 100 pounds of material.
- D) A non-bulk package is empty.
-
You may not park a placarded vehicle within ____ feet of a public roadway.
- A) 5
- B) 10
- C) 25
- D) 50
-
A security plan is required for companies that transport:
- A) Any amount of hazardous materials.
- B) Only explosives.
- C) Large quantities of certain highly hazardous materials.
- D) Any placarded load.
-
The term "Inhalation Hazard" on shipping papers means:
- A) The material is dangerous to breathe and poses a public health risk.
- B) The material has a strong, unpleasant odor.
- C) The material can only be transported in a sealed container.
- D) Special breathing equipment is required for loading.
-
If you must leave a placarded vehicle on the side of the road, it must be:
- A) In clear view for at least 200 feet in each direction.
- B) Unattended for no more than one hour.
- C) Reported to the local fire department.
- D) Always attended.
-
Which is the correct placard for a shipment of bulk flammable liquid?
- A) A red diamond with a flame symbol and the number 3.
- B) An orange square with the number 1.
- C) A yellow diamond with an oxidizer symbol.
- D) A white square with the words "Dangerous."
-
The total weight of all hazardous materials on a manifest is 950 lbs. The shipment includes 50 lbs of a "Table 1" material. Must the vehicle be placarded?
- A) No, because the total weight is under 1,001 lbs.
- B) Yes, because any amount of a Table 1 material requires placarding.
- C) Only if the material is an explosive.
- D) No, because the Table 1 material is less than 100 lbs.
-
When carrying explosives, you must have a written route plan and:
- A) Avoid all cities and towns.
- B) Follow the route plan without deviation.
- C) Get the plan approved by the DOT.
- D) Only travel during daylight hours.
-
The ID number for a hazardous material is the:
- A) United Nations (UN) or North American (NA) number.
- B) Emergency phone number.
- C) Shipper's account number.
- D) Carrier's PRO number.
-
When fueling a placarded vehicle, someone must:
- A) Stay at the nozzle, controlling the fuel flow.
- B) Remain within 25 feet of the vehicle.
- C) Have a fire extinguisher in their hands.
- D) Turn off all electronic devices in the cab.
-
If the shipping papers are lost or destroyed, the driver should:
- A) Create a new set from memory.
- B) Continue to the destination and explain the situation.
- C) Contact the carrier and shipper to get a new copy immediately.
- D) Report the loss to the nearest police station.
-
Which of the following is an example of a "Forbidden" hazardous material?
- A) A Class 8 material loaded next to a Class 4.3 material.
- B) A package of explosives that has become wet and is leaking.
- C) A shipment of corrosives without a security seal.
- D) A gas cylinder that is more than 10 years old.
-
What does "Packing Group I" indicate?
- A) Minor danger.
- B) Medium danger.
- C) Great danger.
- D) The material is a solid.
-
The "DANGEROUS" placard is used when:
- A) You are hauling any amount of two or more Table 2 materials.
- B) You have a mixed load from at least two different shippers.
- C) You have non-bulk packages of two or more Table 2 materials, and the total weight is over 1,001 lbs.
- D) Your load includes both a solid and a liquid hazardous material.
-
When is it acceptable to smoke around a vehicle carrying Class 1, Class 3, or Division 2.1 materials?
- A) If you are at least 50 feet away.
- B) Never.
- C) Only if the vehicle is turned off.
- D) If you are upwind from the vehicle.
-
Your load includes 500 lbs of Division 4.3 (Dangerous When Wet) and 600 lbs of Class 8 (Corrosive Liquid). Which statement is true?
- A) You must use the "DANGEROUS" placard.
- B) You must placard for both Class 4 and Class 8.
- C) You do not need placards because the total weight of each is under 1,001 lbs.
- D) You only need to placard for the Corrosive Liquid.
Answer Key and Explanations
Here are the answers and the logic behind them. This is the most important part of the exercise—figuring out why you missed something is how you make sure it doesn't happen again.
1. B) 10 B:C
- Explanation: Federal rules are clear: any placarded rig needs a fire extinguisher rated at 10 B:C or higher. A 5 B:C is not enough for the kinds of fires you could face.
2. B) When your vehicle is placarded.
- Explanation: If you have placards on your vehicle, you must stop 15 to 50 feet before any railroad crossing. It doesn't matter what you're hauling; the placard is the trigger for the rule.
3. B) On the driver's seat when out of the vehicle.
- Explanation: First responders need to find those papers instantly in an emergency. The regulations are super specific: within your reach when belted in, or on the driver's seat when you're out of the cab.
4. B) In the column titled "Hazard Class."
- Explanation: Shipping papers are standardized for a reason. There will be a dedicated column for the hazard class, making it easy to identify.
5. C) Class 1 (Explosives)
- Explanation: You can't haul Division 1.1, 1.2, or 1.3 explosives in a trailer equipped with a cargo heater or reefer unit. It doesn't matter if the unit is on or off—it's forbidden.
6. B) The carrier must report any spill of that quantity or more.
- Explanation: "RQ" stands for Reportable Quantity. It's an EPA designation. If you spill an amount equal to or greater than the RQ, it must be reported to the National Response Center (NRC).
7. C) Both A and B.
- Explanation: The big-time explosives (Divisions 1.1, 1.2, 1.3) come with big-time rules. You can't take them through tunnels, and you can't park within 5 feet of the road—you need to get well off the shoulder.
8. C) Mixing of materials that could cause a dangerous chemical reaction.
- Explanation: The Segregation Table is your chemical referee. It keeps incompatible materials apart. Think of it this way: you don't load an acid next to a cyanide, because if they both leak, they could create deadly poison gas.
9. A) A flammable solid.
- Explanation: The number at the bottom point of the diamond placard is the hazard class number. Class 4 covers flammable solids.
10. C) The shipper.
- Explanation: The shipper is responsible for everything related to preparing the load, including classifying the material and providing the carrier with the correct placards. The driver's job is to make sure they're displayed correctly.
11. C) Proper shipping name, hazard class, ID number.
- Explanation: The DOT has a non-negotiable order for the basic description on shipping papers. It has to be in that sequence to be compliant.
12. A) It must be listed in parentheses after the primary hazard class on shipping papers.
- Explanation: If a material has more than one danger (a subsidiary hazard), the second hazard class number must be listed in parentheses right after the primary one.
13. C) The Emergency Response Guidebook (ERG).
- Explanation: In a hazmat emergency, the ERG is your bible. It's designed for that exact situation, helping you and first responders know what to do in the first critical minutes of an incident.
14. B) Pull over in a safe, open area away from people and buildings.
- Explanation: Your number one job is protecting the public. If you find a leak, get off the road and away from people, buildings, and water sources. Find a safe, open spot to stop and get help.
15. B) A placarded tank has been emptied but not cleaned.
- Explanation: A bulk tank might be "empty," but it can still hold enough fumes and residue to be dangerous. You must keep the placards on (or use a "Residue" placard) until that tank has been properly cleaned and purged.
16. A) 5
- Explanation: You cannot park a placarded vehicle within 5 feet of the traveled portion of a public road. This is a hard-and-fast rule, except for brief stops made necessary by traffic.
17. C) Large quantities of certain highly hazardous materials.
- Explanation: Not every hazmat load requires a security plan. This rule kicks in for materials that could be targets for terrorism—think large amounts of explosives, poison gases, or radioactive materials.
18. A) The material is dangerous to breathe and poses a public health risk.
- Explanation: "Inhalation Hazard" is one of the most serious warnings you'll see. It means the material is a poison if you breathe it in, and it's a major risk to public health.
19. A) In clear view for at least 200 feet in each direction.
- Explanation: If you absolutely must leave your placarded truck unattended on the roadside, other drivers need to be able to see it clearly from at least 200 feet away in both directions.
20. A) A red diamond with a flame symbol and the number 3.
- Explanation: This is the universal symbol for a Class 3 Flammable Liquid. Red means flammable, the flame symbol is obvious, and the "3" confirms the hazard class.
21. B) Yes, because any amount of a Table 1 material requires placarding.
- Explanation: Don't get tripped up by the 1,001-pound rule. That applies to Table 2 materials. Anything listed in Table 1 must be placarded, no matter how small the amount.
22. B) Follow the route plan without deviation.
- Explanation: When hauling certain explosives, you must have a written route plan from your carrier. Your job is to follow that plan exactly. The only reasons to deviate are for emergencies or approved stops.
23. A) United Nations (UN) or North American (NA) number.
- Explanation: That four-digit number is the material's universal ID. It's the same on shipping papers and placards and is the key to finding it in the ERG.
24. A) Stay at the nozzle, controlling the fuel flow.
- Explanation: When you're fueling a placarded truck, someone has to be physically at the nozzle, controlling the flow, the entire time. No setting it and walking away.
25. C) Contact the carrier and shipper to get a new copy immediately.
- Explanation: You are not legally allowed to move a hazmat load without the correct shipping papers. If you lose them, you have to stop and get a new set before you can continue your trip.
26. B) A package of explosives that has become wet and is leaking.
- Explanation: A "Forbidden" material is something so dangerous it can't be transported. A wet, leaking package of explosives is incredibly unstable and is a perfect example of a forbidden item.
27. C) Great danger.
- Explanation: Packing Groups (PG) tell you how dangerous a substance is. PG I means great danger (the highest risk), PG II is medium danger, and PG III is minor danger.
28. C) You have non-bulk packages of two or more Table 2 materials, and the total weight is over 1,001 lbs.
- Explanation: The DANGEROUS placard is a shortcut. You can use it when you have a mixed load of non-bulk packages from Table 2, as long as the total weight of all the hazmat is 1,001 lbs or more.
29. B) Never.
- Explanation: The official rule is no smoking within 25 feet of a truck placarded for Class 1, Class 3, or Division 2.1. But the real-world, common-sense answer is just don't do it. Ever.
30. B) You must placard for both Class 4 and Class 8.
- Explanation: Your total hazmat weight is 1,100 lbs, which is over the 1,001-pound limit for Table 2 materials. Because you have two different classes, you must display placards for both Class 4 and Class 8.
How did you do? If you scored below 80%, don't sweat it. That's why you take a practice run! It shines a light on the exact areas you need to brush up on. Go back to your study materials and hit those weak spots again. Building a solid foundation across all subjects, including things like the air brakes test, is what gives you real confidence on test day. Give this practice exam another shot tomorrow and see the difference.
Proven Strategies for Test Day Success
You can study the Hazmat manual until you know it cover-to-cover, but that’s only half the battle. Test day brings a unique kind of pressure, and having a solid game plan for the exam itself can make all the difference. This is where a little real-world advice from drivers who’ve been there before really pays off.
Knowing how to take the test is just as critical as knowing the material. When you hit a question that makes you second-guess yourself, don't freeze up. The best tool you have is the process of elimination. Immediately rule out the answers you know are dead wrong. This simple trick narrows your options and seriously boosts your odds of landing on the correct one.
Managing Your Time and Nerves
Pacing yourself is everything. The test has 30 questions, which gives you more than enough time to think things through, so there’s no need to speed. If a question completely stumps you, just flag it and circle back later. You'd be surprised how often the answer clicks after you've confidently knocked out the ones you know. This keeps you from getting bogged down and wasting precious time.
The day before your test should be about preparation, not panic. Forget cramming all night—your brain needs to be sharp. Do a light review, make sure you have all your paperwork ready to go, and then get a good night's sleep. Trust me, walking in well-rested is far more valuable than that last hour of frantic studying.
On test morning, have a good breakfast but go easy on the coffee. You want to be focused, not jittery. The goal is to walk in feeling calm, collected, and ready to own that test.
Spotting Common Question Traps
Read every single question carefully. Test creators love to use tricky wording to see if you're paying attention. Keep an eye out for absolute words like "always," "never," or "except," because they can flip the entire meaning of a question on its head.
It’s also crucial to remember the regulations behind the test. The USA PATRIOT Act of 2001 is why every applicant needs a TSA threat assessment. More recently, completing Entry-Level Driver Training (ELDT) became mandatory before you can even sit for the exam. The test itself is made up of 30 DMV questions on these rules, and you'll need an 80% passing score. The fee is usually somewhere between $10 and $50.
Last-Minute Review Checklist
Right before you head into the testing center, a quick final scan of the most important facts can be a huge confidence booster. Don't try to cram whole chapters. Just hit the highlights—the stuff that’s easy to forget under pressure.
- Placard Colors and Symbols: Do a quick mental run-through. Red for flammables, orange for explosives, yellow for oxidizers, skull and crossbones for poisons. Just the basics.
- Key Numbers: Refresh the big ones. The 1,001-pound placarding rule, stopping 15-50 feet from railroad tracks, and no parking within 5 feet of the traveled part of the road.
- Segregation Rules: You don't need the whole chart memorized, but lock in the absolute no-nos, like never mixing cyanides and acids.
This targeted, last-minute review keeps the critical info at your fingertips. Combining this with all the other practical skills you've been building, like doing a proper pre-trip inspection, will put you in the best possible position to pass.
Tying Up Loose Ends: Your Hazmat Endorsement Questions Answered
As you get ready to head to the DMV, a few final questions always seem to pop up. Think of this section as a quick chat with a seasoned driver, clearing up those last bits of uncertainty before you take the test.
How Long Am I Stuck Waiting for the TSA Background Check?
This is the big one everyone asks about. Officially, the TSA's Security Threat Assessment can take anywhere from 30 to 60 days.
Realistically, some folks get their approval back in a couple of weeks, but you can't count on it. I've seen others get held up for various reasons. The best advice I can give is to get your application and fingerprints done as soon as you decide to go for the endorsement. That way, your approval is hopefully waiting for you the moment you pass the written test, and you're not stuck in limbo.
Is My Hazmat Endorsement Good in Every State?
Absolutely. Once you have that "H" on your CDL, it's valid nationwide. The whole system is governed by federal rules from the FMCSA and TSA, so what works in California works just the same in Maine.
As long as your license and endorsement are current, you're cleared to haul hazardous materials across any state line.
What if I Don't Pass the Hazmat Test on the First Try?
Don't sweat it. It happens, and it's definitely not the end of the line. You can retake the test.
Most DMVs will make you wait a day or so, and yeah, you'll have to pay the fee again. But here's how you turn it into a win: a failed test is the best study guide you could ask for. It pinpoints exactly where you're weak. Go home, hit a good cdl hazmat endorsement practice test, and drill down on the topics that tripped you up.
Think of a failed test not as a failure, but as a roadmap. It shows you the exact route you need to take to pass the next time around.
How Often Do I Have to Go Through This Renewal?
Your Hazmat endorsement is good for five years. But renewing it isn't as simple as just getting a new sticker.
Every five years, you have to go through the whole TSA Security Threat Assessment again—that means a new application and new fingerprints. On top of that, some states will make you retake the written knowledge test. It's crucial to check with your local DMV to see what their rules are well ahead of your expiration date so there are no surprises.
Ready to stop practicing and start earning? The first step to a high-paying career is getting the right training. At Patriot CDL, we provide accelerated, hands-on programs to get you on the road fast. Learn more at https://patriotcdl.com.